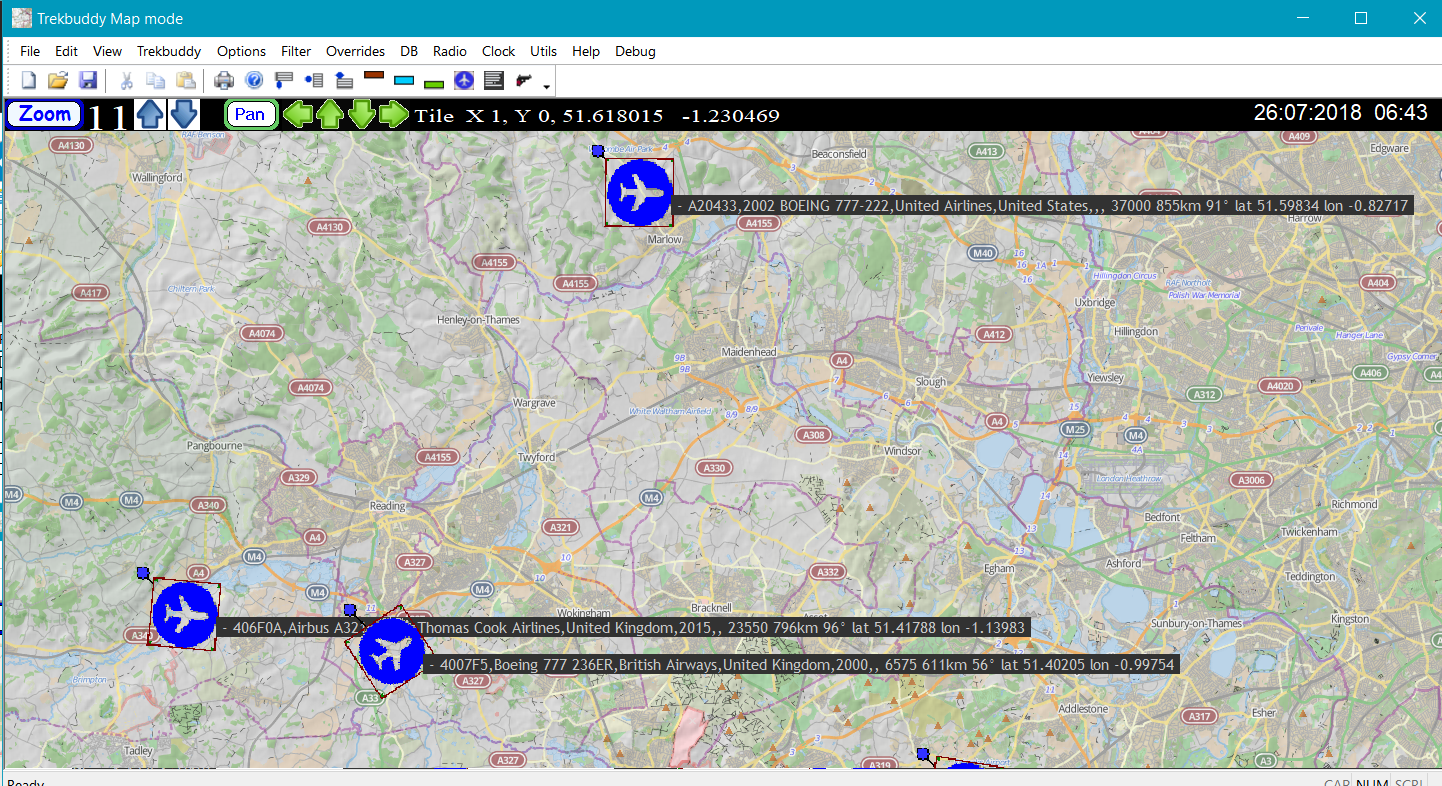
Click the View menu and Map to show the aircraft on your map. See lower down this web page for how to download a Trekbuddy map.
For the PMTest2.exe you will need to install Microsoft Visual C++ 2015 Redistributable Update 3. It can be downloaded from the Microsoft web site at: https://www.microsoft.com/en-us/download/details.aspx?id=53840
PMTest2.exe is a 32 bit VS2015 C++ app and you'll need the x86 version of the C++ Redistributable vc_redist.x86.exe.
The dll's need the Visual C++ Redistributable for Visual Studio 2012
It can be downloaded from: https://www.microsoft.com/en-us/download/details.aspx?id=30679
You'll need the x86 version of the VS2012 C++ Redistributable vc_redist.x86.exe, It's the same name as the VS2015 file but is different so when you download it save it with a different name.
You can run PMTest2.exe on earlier versions of Windows from version 8 onwards but you might need to install the latest
Microsoft .NET Framework 4.6.1
from
https://www.microsoft.com/en-us/download/details.aspx?id=49982
Trekbuddy maps.
The Trekbuddy map viewer came from one of my earlier programs GPSSC. Have a look at these GPSSC web pages for ways of making Trekbuddy maps.
http://www.stevematt.f9.co.uk/ukspeedcamera/trekbuddy.html
http://www.stevematt.f9.co.uk/ukspeedcamera/maperitive.html
Mobile Atlas Creator is best for creating Trekbuddy maps of larger areas up to zoom level 11. For smaller areas at higher zoom levels then it may be better to use Maperitive.
Both these programs can be used to create Trekbuddy maps from OpenStreetmap web sites. If you have an earlier version of Mobile Atlas Creator from a few years ago when it was called Trekbuddy Mapmaker you might also be able to download Arcgis and Bing maps.
PMTest2.exe calculates the longitude and latitude of the map tiles by presuming that they are in OpenStreetmap format. As they would be if you use Mobile Atlas Creator to download a set of map tiles. Because the Earth is not a perfect sphere and the way WSG84 latitudes are measured, latitudes nearer the Earths poles have more distance. If you make a set of map tiles by some other method for example by using TB Cutter then the tile latitudes and aircraft positions in PMTest2.exe might be slightly out.
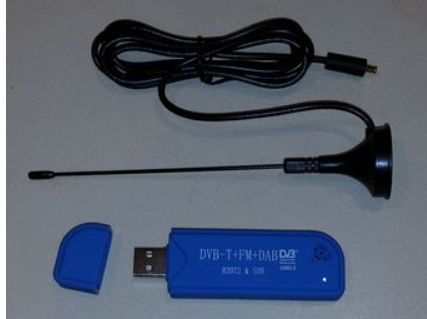
USB radio drivers.
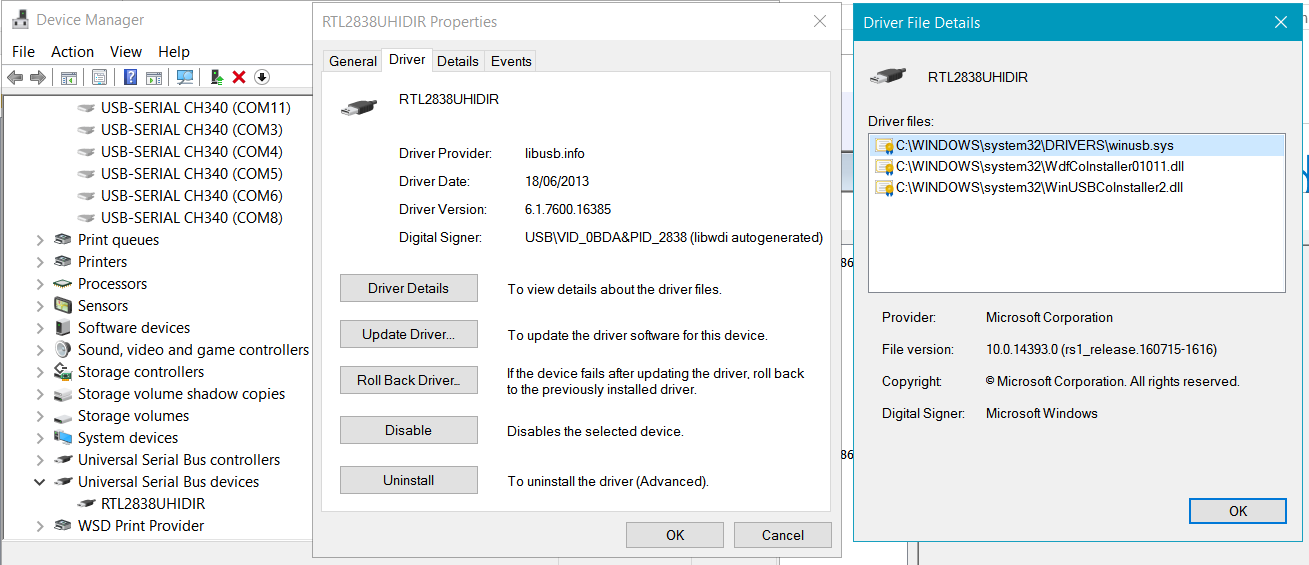
You need to have the WinUSB driver installed for your USB device. If you have installed the TV driver that comes with the USB stick you will need to delete that and replace it with the WINUSB driver. There is a utility app on the web called Zadig that can help you do that.
Here is a screen shot of my driver setup.
More info on installing Winusb is here
http://www.stevematt.f9.co.uk/flightmirage/usbstick.html
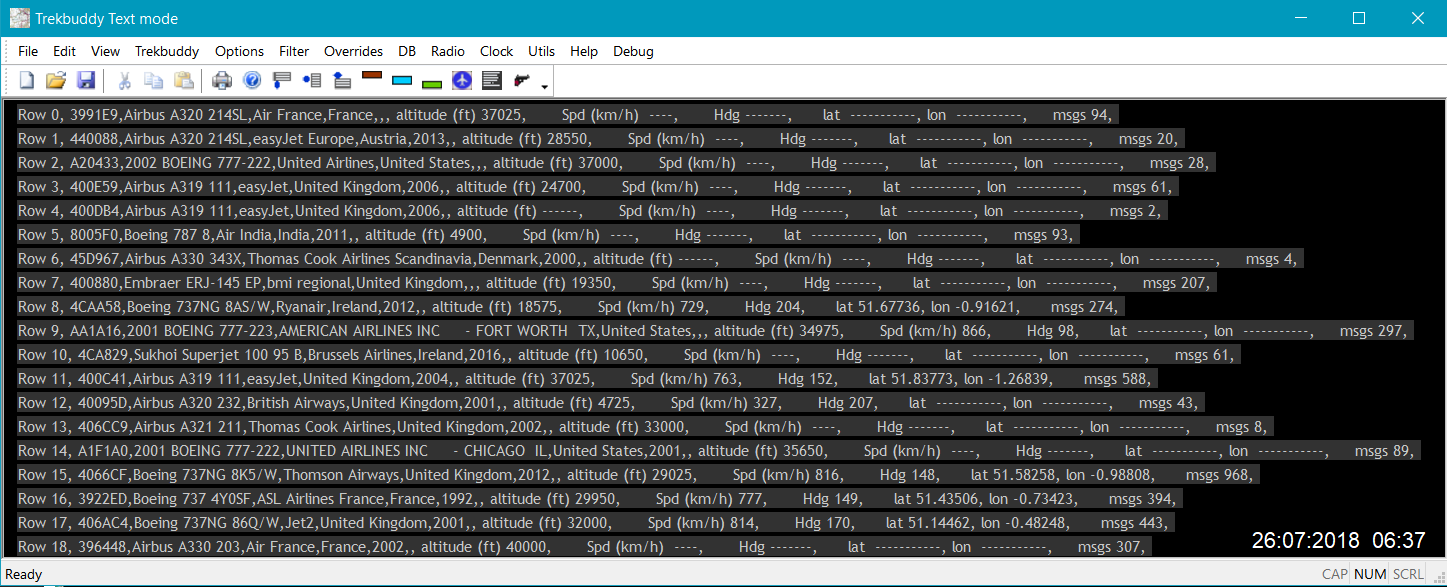
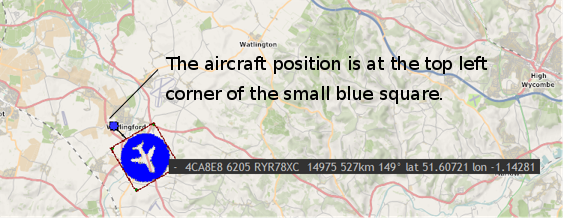
Aircraft position indicator.
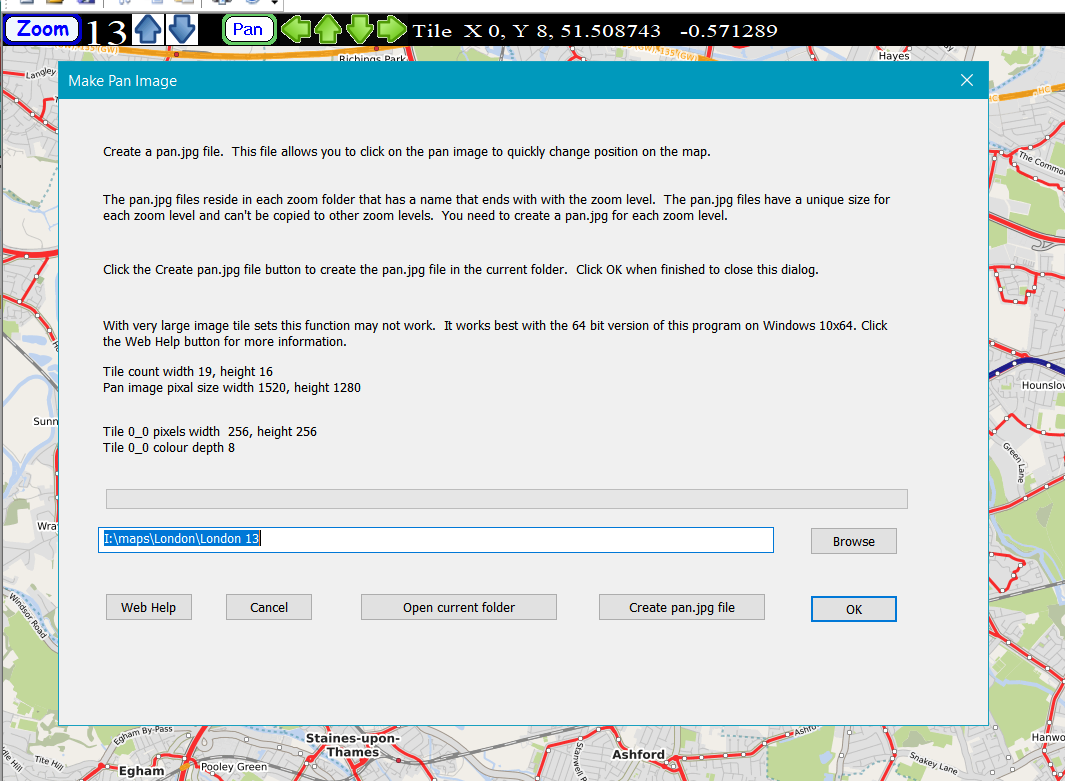
Making Pan images.
Pan images allow you to quickly move to a different position on the map.
Before you make a Pan image make sure that PMTest2.exe has been started without the radio started. If it is enabled in Autostart turn it off and restart the program. If the screen is redrawn while a Pan image is being made it makes it fail.
In the Make Pan Image dialog there is the option to Browse for a folder or you can type in a different folder name.
This will be ignored by the dialog, it will only make a Pan image for the current displayed zoom level.
Make sure you have the map displayed at the zoom level that you want and then select Make pan files from the Trekbuddy menu.
Close the Make Pan Image dialog and change the map zoom level for each Pan image file you want to make.
Import aircraft descriptions.
A program feature under development is to be able to display the aircraft model
on the aircraft label. This is going to be done by using a look up file
containing the ICAO codes, the aircraft model, the owning company and the date
the aircraft was registered. This feature is now written and functional. You can create this file by using the DB menu
and Import from json files. The json files come from the
www.adsbexchange.com website here https://www.adsbexchange.com/data/#
For example, June 20th’s data can be downloaded at the following URL:
http://history.adsbexchange.com/Aircraftlist.json/2016-06-20.zip.
Extract the json files to a folder using a utility like 7zip or Windows Extract
All. Use FlightMirage's dialog to extract the model data to the file
Importeddata.csv in the folder where you have PMTest2.exe. For more
information see http://www.stevematt.f9.co.uk/flightmirage/json.html.
You can download my own lookup file from here
https://flimirx.wixsite.com/filecab/db
It's 5.3MB zipped. Unzip it into the same folder as PMTest2.exe. Don't forget to remake the programs index file. See
http://www.stevematt.f9.co.uk/flightmirage/useindex.html for how to do that.
Aircraft model options.
http://www.stevematt.f9.co.uk/flightmirage/label.html.
More about how the Importeddata.csv file is used.
http://www.stevematt.f9.co.uk/flightmirage/labelmore.html.
Using an index file to speedup the programs search for aircraft models.
http://www.stevematt.f9.co.uk/flightmirage/useindex.html.
How map boundaries are calculated.
http://www.stevematt.f9.co.uk/flightmirage/boundaries.html.
Replaying aircraft positions by using ADSBExchange JSON files.
http://www.stevematt.f9.co.uk/flightmirage/replay.html.
Oneshot - download a single JSON file of aircraft in your
map area using the API at opensky-network.org and display the aircraft.
http://www.stevematt.f9.co.uk/flightmirage/oneshot.html.
Extracting a geographic area from a set of ADSBExchange JSON files.
http://www.stevematt.f9.co.uk/flightmirage/extract.html.
Filter aircraft to show on the map only those aircraft that are between certain heights.
http://www.stevematt.f9.co.uk/flightmirage/filter.html.
Using FlightMirage without a radio device.
http://www.stevematt.f9.co.uk/flightmirage/noradio.html.
Auto update searches through a file called aircraftDatabase.csv and adds any entries to this programs to this programs data file Importeddata.csv.
It only does this for aircraft that are currently seen in your local area by your USB dongle. You can get the file aircraftDatabase.csv from
https://opensky-network.org/datasets/metadata/
Put it in the same folder on your PC as PMTest2.exe. This is fairly slow but gives you a way of keeping your Importeddata.csv up to date.
There is no warranty with FlightMirage. The demo is free. You use it entirely at your own risk. FlightMirage is still in Beta testing and although it is functionally mostly complete you will find some menu items that have not been coded yet. It should work with various TV cards and devices as dump1090 does but has only been tested with the one shown here.
If you are looking for the version of Flightmirage that has the experimental Brother printer firmware send dialog it is here
http://www.stevematt.f9.co.uk/flightmirage/brother.zip
My home page
Last updated 02 August 2019