PicGrinder program for Microsoft Windows 10, a free program for desktop screen capture.
It can capture audio and an area of the windows desktop at up to 25 FPS and saves to a set jpg images. The audio is saved as a .wma file.
By using another free program Avidemux these images can be converted into a video file.
You could use PicGrinder for things like:
- Extracting still images from a video.
- Record jpg images of a video playing on your screen and use another free program
Avidemux
to make them into a new video.
- Make an educational video of your desktop and webcam.
- Record parts of a video playing on your screen. i.e. record 10 minutes of
a 60 minute video.
- Record sound that is playing on your PC as a .wma file.
Download the program and unzip it using 7zip or Windows Extract All. Double click
the PicGrinder.exe file to run it. It's best to extract this program into a folder on it's own. Read the use instructions lower down for how best to install and use the program.
PicGrinder
25 February 2022.
Click on the link here to download program picgrinder.zip x86 32bit
Requirements:
This 32 bit version of PicGrinder is a Microsoft Windows 10 program but it will also run on Windows 8 and 8.1 32 bit and 64 bit versions if you install the latest version of the NET Framework.
You will need to have the 32bit C++ Visual Studio 2019 runtime dlls installed. vc_redist.x86.exe File Size:13 MB.
They can be installed from the Microsoft web site at
The latest Microsoft Visual C++ Redistributable.
On earlier versions of Windows you
might also need to have Microsoft . NET version 5 (Visual Studio 16.8 or later) . NET Framework versions 4.8, 4.7. installed. If it is not already installed on your PC
you can download it from the Microsoft web site at
Microsoft .NET Framework 4.8.
Some antivirus software will block applications the first time they are run.
Bitdefender seems to block every app from small vendors. So if the program does not start have a look at your antivirus.
The first time you run the PicGrinder program Windows 10 Smartscreen might give a
warning window. Just click on more info and then Run anyway. After
that it should start without any problems.
PicGrinder overview.
Basically click the button with a 2 and two dots to record both images and
audio.
Click the single red dot button to record only images.
Click the microphone with red dot button to record only audio.
Click stop to stop recording.
Convert the wma file to mp3 to use the audio with
Avidemux. "Audio
Convertor" from Windows 10 Store works well.

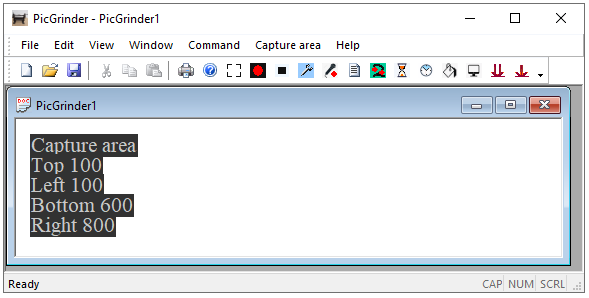
The button like [] lets you set the top left and bottom right corners of the
area that you want to record.
Use the Auto fill function to insert skipped frames in the image folder.
The audio file is called test.wma and the images are created in subfolder vid1.
Rename these after each recording if you don't want them to be over written next
time you record a video.
Overview.
PicGrinder records an area of you screen to a set of jpg files. A folder is
created in the same folder as the PicGrinder program is located. That
folder is called vid1.
By default PicGrinder will record up to 90,000 screen frames, which is about one
hour of captures at 25 FPS. You can set the maximum number of recorded
frames which effectively sets the record time using the dialog opened by the
sand timer button.
PicGrinder records an .wma sound file which is called test.wma which is created
in the same folder as the PicGrinder program is located. The sound is
recorded from the PCs sound mixer driver. You need to set your
speaker volume to about 70% for the best quality.
Rename the Vid1 folder and the test.wma after recording to prevent them being
overwritten the next time you record something.
Recording only sound.

Click the microphone button, Click the stop button to finish. The sound
file which is called test.wma is created in the same folder as the PicGrinder
program is located.
Recording an area of the screen.
 Records an area of the screen as a set of .jpg files in the folder vid1.
 Record both a screen area and sound. If you want to make a video and have
the sound synced to the video this is the button to use. You can create a video
from your recordings by using another free program called Avidemux which can be
found on the web.
Record both a screen area and sound. If you want to make a video and have
the sound synced to the video this is the button to use. You can create a video
from your recordings by using another free program called Avidemux which can be
found on the web.
 Minimize the program and record an area of the screen as a set of .jpg files in the folder vid1.
 Minimize the program and record both an area of the screen and sound. If you want to make a video and have
the sound synced to the video and have only one monitor you might prefer
to use this button. You can create a video
from your recordings by using another free program called Avidemux which can be
found on the web.
Minimize the program and record both an area of the screen and sound. If you want to make a video and have
the sound synced to the video and have only one monitor you might prefer
to use this button. You can create a video
from your recordings by using another free program called Avidemux which can be
found on the web.
Using PicGrinder
PicGrinder is a new program created in February 2019. It currently has it's
basic functions to do what it needs to do but does not have the pretty
appearance of other mature programs.
It has an advantage over some of the other programs available in that the
process of making a video is done after making the recording. That should
allow PicGrinder to do a better job of capturing the screen.
If you want to make videos there are a few other free programs that you'll need
to install to get the job done. You can probably find other programs that
I have not listed that can do the same things.
- My CoverU program from
http://www.stevematt.f9.co.uk/coveru/coveru.html. When choosing the
area of the screen to record, CoverU can be used to stop the mouse clicks going
through to the apps that are on screen. You make a transparent bitmap to
use in CoverU that is larger than the area that you want to record and with
CoverU active you click on the area you want. This is needed if you are running
apps that aggressively capture the mouse clicks. Stealing control of the
mouse away from PicGrinder.
- Irfanview a useful free image editor that can resize bitmaps created by CoverU.
- Avidemux 32 bit or 64 bit. Used to convert the captured jpgs and sound into
a video. I found that videos made with the later versions would not play on my
Technika freeview recorder or on my F&H Blue-Ray player. Avidimux 2.7.1
videos played OK. version 2.7.6 and 2.8 would not play even though the
Codecs were the same in all the videos.
- A converter to convert the recorded sound from a .wma file to a MP3 file that
Avidemux can use. "Audio
Convertor" from the Windows 10 Store is free and works well.
- VLC is useful because the Windows 10 video players wont always play the sound in
created video files. VLC has it's own built in CODECs.
- Audacity. If you turn on show clipping you can see if the record volume is too loud in your recorded MP3 audio file.
You can also remove sections of your audio MP3 file.
Making a video.
Get whatever you want to record ready on screen.
If you are running apps that aggressively capture the mouse clicks. Start
CoverU so it covers the area you want to record.
Start PicGrinder.
 Click the rectangle button. Click the top left of the area you want to record.
Click the bottom right corner of the area you want to record.
Click the rectangle button. Click the top left of the area you want to record.
Click the bottom right corner of the area you want to record.
 Use the sand timer button if you want to set the recording length.
Set FPS and minutes then the Calculate number of frames buton, then OK.
Use the sand timer button if you want to set the recording length.
Set FPS and minutes then the Calculate number of frames buton, then OK.
Make sure CoverU is not in the way. Although you can record through the
transparent bitmap if you want.
Click the record or the record both button to start recording.
Make sure PicGrinder is not in the way of the record area.
You can click stop or let it stop at the set recording length. If you
did not set a recording length it will stop after 90000 frames (1 hour).
Click the fill button. Set the path of the vid1 folder and click Auto fill
frames. You will normally need to do this because unless you PC is super
fast you are likely to have skipped frames. Wait 5 or 10 minutes for the
fill process to finish. Avidemux tends to come up with an error message if there
are skipped frames and you will need to use Auto fill frames to prevent that
problem.
Convert the .wma file to a MP3 file.
Use Avidemux to make a video file. You can also use Avidemux to play
your recording without the need to make it into a video if you want.
The Frame rate dialog. Ways that it can be used. Frame rate dialog
Points to watch. The audio recording will not start if there is no sound being played but the screen capture always starts straight away.
Make sure your audio source is playing before you start recording with PicGrinder. If you start your audio source playing after you start recording then your audio is likely to be out of sync with the video.
Getting the best recordings. PicGrinder will give you decent results on a slower PC but for near perfect recordings you need the following setup.
- Add ram to your PC and use a Ram drive. Add more memory to your PC, 16GB
will allow one hour recordings at 1200 by 900. Assign 12GB to a Ramdisk.
ImDisk works well. It is available for free at
https://sourceforge.net/projects/imdisk-toolkit/ When you want to use
PicGrinder copy it onto the Ram drive and run it from there. Screen and audio
captures will be saved on the Ram disk. Use Avidemux to make a MP4 video saving
it on another drive.
- Use a PC with an I5 or better processor.
- Set Focus assist to priority only.
- Go to Settings Background Apps and turn off apps that you do not use.
- If you have dual display monitors you can record larger screen areas that span
across the two screens. The resulting video that is made will have no
screen frames in it and looks like any other video you make but just bigger.
Go too big though and PicGrinder will start skipping frames.
The PicGrinder program is free to download and use. In the unlikely event that
you have problems with it I have this disclaimer. The programmer accepts no
responsibilty for any loss or damage you might do to your PC or files or any
other loss that you might occur. You use
the program entirely at your own risk. You may not redistribute the
program.
Back to the home page
Last updated 24 February 2022